Here is a boss guide to every boss. I hope you use it for all your WW boss needs!
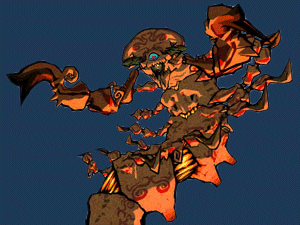
Gohma- 1.5/10 difficulty
This is the guy who's been bugging Valoo. To calm Valoo, defeat this guy. He has only 2 attacks: hit you with his claws, and blowing fire at you. If you keep jump to the sides, you won't get hit.
The most important thing Link needs to do when battling Gohma is avoid his extremely powerful claws. Gohma will bring a swift claw down on Link if he stands still for too long, so always keep moving. More commonly, scorpion will sink both of its claws into the ground, and trap its prey so that it can blow the large flames onto it. If Link ever gets caught between one of the claws, then quickly role under the large part of either claw. As long as Link is out from between those claws, he won't get hurt by the flames.
Now it is time to go on the offensive and break Gohma's shell. Use the Grappling Hook and target Voloo's tail as it hangs down from the ceiling. By swinging on the tail, Link will pull Voloo downward enough to make large chunks of the cave's ceiling fall down onto Gohma.Do this cycle three times, and Gohma's shell will fall off.
Once you have knocked Gohma's shell off, leap back onto the ground and prepare for a fury of final attacks. Knowing that Gohma has been severely damaged, Gohma will try to keep its eye away from Link. Counter this by using the Grappling Hook to pull it down within reach, and then quickly slash at it before Gohma retaliates. After two times, you should have Gohma defeated. He gives you a heart container. After that, go into the light.
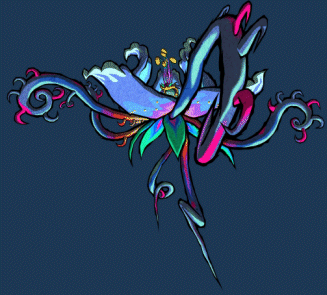
KALLE DEMOS- 3-10 difficulty
Go to the middle of the room and you'll find Makar, the missing Korok. When you are about to rescue him, a Boko Baka behind him eats him up and well... this is no Boko Baba, more like a larger version...10 times larger. So much for this being simple.
The flower attaches itself to the ceiling with about 15-18 vines. There is no way to attack Kalle Demos while its hanging up in the air, so you'll have to send it back down to the ground to be able to inflict damage. That's a bummer.
Kalle Demos has quite a few ways of attacking Link, but they're more of a deterrent then an offensive strike. The first attack it will do is a quick smack, from one of its many roots. The plant will use its entire root system in one direction to create a wavy wall in front of Link. Getting hit by one of these flapping, wagging tails causes Link to lose 1/4 of a heart from his life gauge.
Be very careful when its roots are hovering overhead. It will snap one of them down very quickly, and it is very hard to dodge this attack. Fortunately, this attack doesn't do very muge damage either, only 1/4 of a heart. It is quite important to try to dodge these roots, but while you're doing it, an offensive attack would help out. Use the Boomerang to slice the vines that it hangs from. You'll need to do this several times, since there are so many. When the flower falls to the ground, its sensative inside is exposed. That is your cue to run into the center of the room and unleash a combo attack as quickly as possible. You need to act swiftly, because the flower won't stay down for long. Before you know it, the plant will rise up and swallon Link whole, which will damage him one whole heart. Quickly backflip onto the flower to avoid being chomped on after it spits you out.
Continue attacking the vines with the Boomerang to drop the flower to the ground. After landing a third and final combo attack to the flowers center, you should have the beast defeated. Be sure to grab the heart container before you step into the swirling wind!
After you defeat Kalle Demos, Makar will thank you for saving him. Grab the Heart Container and then step in the blue teleporter to be teleported back on the lily pad in front of the Deku Tree. They will thank you and begin their ceremony.
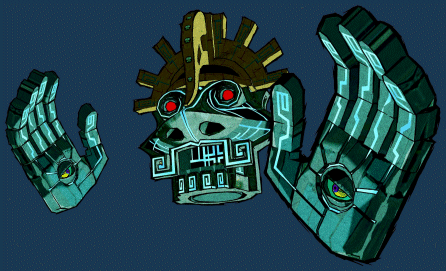
GODHAN- 4.5-10 difficulty
Gohdan is so much like the Bongo Bongo boss battle in The Legend of Zelda: Ocarina of Time for the Nintendo 64 it's not even funny.
Strafe around the arena while targetting the hand nearest Link by pressing the L Button. Fire arrows at its eyeball. The hand flips over after it has been hit twice, signalling that it is no longer a threat. Then target the other hand and shoot arrows into its eyeball. Once both hands have flipped over, the face begins putting up a tougher fight. Roll over to dodge its projectile attack, and fire arrows into each of its red eyes. Grab a bomb and toss it into the beast's mouth as soon as it opens. You must do this quickly, however, or his face and its accompanying hands recover.
In addition to his occasional projectile attack, Gohdan uses his hands to sweep you off of the arena floor and into the electrified pit that runs around the perimeter of the room. Keep up the attacks by constantly L-targeting the red eyes on Gohdan's face. This helps you be more accurate with the bow, and also helps you sidesqipe his projectile attacks, that become more and more frequent as the battle rages on.
To succed in the battle, you must detonate three Bombs in Gohdan's mouth. Then you're given a Heart Container and allowed into a place only where the chosen are permitted to enter...Hyrule Castle.
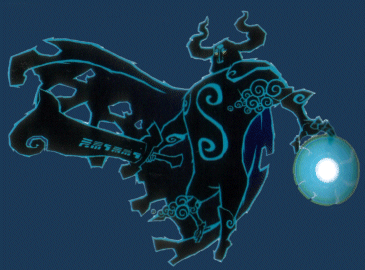
PHANTOM GANON- 5-10 difficulty
The sword the Phanton Ganon carries is much larger then Link's Master Sword is. It's also capable of unleashing magical energy attacks. Phanton Ganon will take to the air and begin attacking with its energy blasts. Link has two options here. The first option is to volley the energy blasts back at Phantom Ganon by hitting them with your sword in a timely fashion. The alternative is to strafe and dodge the attacks.
As the battle progresses, Phantom Ganon will eventually move close to the ground. This gives Link a chance to attack, but also gives Phantom Ganon a chance to use his sword, which does massive damage, 2 full hearts to be exact. The key is to quickly pinpoint the beast's location and rush in to attack. Land one quick thrust attack to knock it down to one knee, and then unleash a massive combo attack. It will take three of these combo attacks to beat Phantom Ganon.
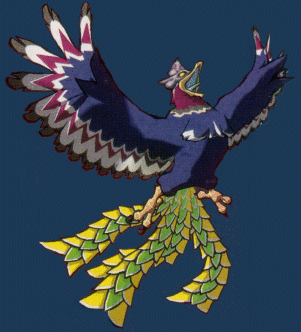
HELMAROC KING- 6-10 difficulty
The Helmaroc King will waste no time in getting down to business. Keep an eye on it by keeping the camera zoomed out as best as possible. Target the bird by using the L button as soon as it touches down on the rooftop's center. The bird's main attack is the beak strike, which does 1/2 of a heart damage. Dodge this attack so its beak gets stuck into the floor, and then quickly strike it with the Skull Hammer. After you hit it in the head, the bird will take into the air. Keep the hammer in Link's hands, and watch for the bird to land for another attack.
After the third blow to the bird's head with the Skull Hammer, it gets pissed off. Keep the camera zoomed out to track its movements. Watch for it to swoop by, dragging its talons on to the ground. Another one of its attacks is to hover and flap its wings so hard that Link gets blown into the spikes that protrude from the walls. Link can run against the wind without losing to much ground.
The Helmaroc King will eventually settle down, and when it does so it will give its beak strike another try. Dodge the attack one last time and hit the bird in the faceplate with the Skull Hammer. This will cause the protective gear to fracture and fall off, thereby exposing the bird's sensitive crest. While the birds beak is burried into the ground, use the sword and target the yellow area atop its head, unleashing many combo attacks. After three combos, the bird will be defeated.
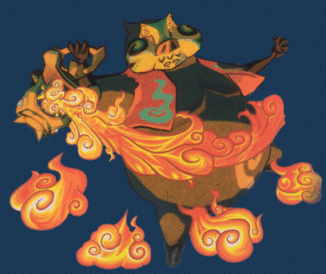
JALHALLA- 5-10 difficulty
Jalhalla may be much larger then the regular Poes, but he is defeated using the same strategy. The first thing Link needs to do is seek out the source of rotating light. Run to the light and use the Mirror Shield to reflect the light onto Jalhalla. If Link keeps the light on it long enough, it will be forced out of the spirit realm and into a physical form in which Link can damage. Rush toward the giant ghost and press the A button to pick it up. Slowly rotate while standing in place until you're facing one of the purple columns of spikes that extend up the wall. Press the A button again to toss Jalhalla into the spikes, effectively popping it. The explosion will release all of th Poes into the room. This is Link's chance to severely weaken Jalhalla by destroying as many Poes as he can, before they reunite inside its mask. Link can use any weapon to destroy as many Poes as he can.
As soon as it regroups, Jalhalla will increase the frequency of attacks. Link can expect the giant ghost to blow its lantern flames into him, try to blow him right into the spikes on the wall, or even try to belly flop onto him. As the battle goes on, Link will get less and less time to attack. Make sure you don't miss any opportunities to strike, and when one arrises, be sure to attack. If you do this, you will eventually beat Jalhalla.
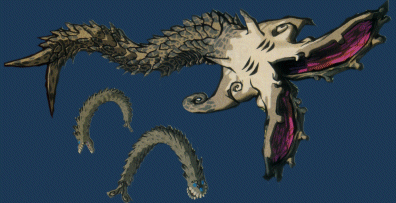
MOLGERA- 7-10 difficulty
The battle begins with Molgera rising to the surface and showing Link its vulnerable tongue. Stand near the edge of he hole in the sand and L-target it with the Hookshot to draw it out of the mouth. Quickly slash at it with the sword, inflicting as much pain as possible, before it retracts back into the beasts mouth.
Stay on the move throughout the battle. Rolling will help avoid getting stuck in holes that open up in the ground around Molgera's mouth. Rolling also makes it harder for the baby Molgera's to catch up with you. If you need life, you can pick up a couple of hearts by killing the baby Molgeras swarming around you, but it is much better to ignore then and focus on offensive attacks against the big guy. You must land four combonation attacks on the tongue in order to win the battle.
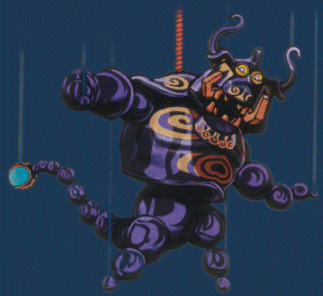
PUPPET GANON- 8.5-10 difficulty
Puppet Ganon has three forms: a marionette, a spider, and a snake. Each of these forms is incredibly large compard to Link's tiny frame. They will use their immense size to their advantage. The other common feature each of the forms is the crystal ball it possesses. This is your target. To defeat Puppet Ganon, you must hit this crystal ball with three Light Arrows during each phase of the battle.
PHASE ONE: THE MARIONETTE
Six thick, blue strings and a red string suspend the marionette version of Puppet Ganon. Use the boomerang to cut through the blue strings, just as you did to cut the vines while battling Kalle Demos. The difference here is you must cut them twice with the boomerang before they break. Once you have cut several of these strings, the beast will spin wildly. Although it's possible at this time to hit the crystal ball om its tail as it whips past, the more effeciant stategy is to cut the remaining blue strings, which will make the beast hang limply in place. Quickly dash toward the ball as it rests on the ground and draw the Hero's Bow to hit the crystal with a Light Arrow. Continue the battle until you've struck the crystal ball three times.
PHASE TWO: THE SPIDER
No matter where you are when the spider comes crashing down, you'll be trapped between two think, immovable spider legs. The strick is to tilt the camera to watch the spider's reflection in the pool of water on the floor. Move toward the area under the crystal ball, and step away from the water as the spider plummits to the ground. If you do this properly, you'll find yourself standing right next to the crystal ball, with a clear shot. Launch a Light Arrow at the crystal, and repeat this strategy three times to defeat this phase of the boss.
PHASE THREE: THE SNAKE
The final phase of the battle comes in the form of a snake, Puppet Ganon will be dragged around the arena by its red string, and you must land three final hits on the crystal ball at the snake's tail. This portion of the battle is much more chaotic then the previous two, as the snake constantly gains speed, making it very difficult to hit the crystal ball with out running out of magic and arrows. Link is likely to take a few hits during this fight, so if you havn't assigned a blue potion to an item use button, this is a good time to do so. Although it is possible to slash the snake in the face with the Master Sword to temporarily slow it down, it is far too risky. Instead, hunker down against the wall and try to hit the crystal ball on the end of the snake as it streaks around the room. After three hits to the crystal, Pippet Ganon is finally defeated.
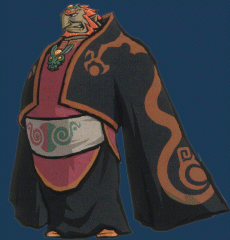
GANONDORF- 10-10 difficulty
When the battle begins, Princess Zelda, who comes to help out Link, will instruct Link to attack Ganondorf as much as he can, as she covers his back with the Hero's Bow. Ganondorf will immediately leap on you with his twin swords swinging. Jump to the side and watch as Princess Zelda lands a light arrow in him. Rush in and deliver a swift combo attack with the Master Sword. Ganondorf is very strong, therefor it will take more the this one combo attack to defeat him.
Fighting Ganondorf is similar to fighting the Mighty Darknuts, only Ganondorf has two swords and is much faster. You won't land any strikes while you're standing face to face with Ganondorf: you must rely on the parry attack! Follow up a successful parry attack by slashing away at Ganondorf's backside, and then move away quickly before he rises again. Continue to distract him while Princess Zelda fires Light Arrows at him. After three hits from Princess Zelda's Light Arrows, Ganondorf realizes that he shouldn't take the youthful duo so lightly. Ganondorf will rish towards Princess Zelda, and knock her unconscious. Link is on his own for the time being. Assign the Elixir Soup to an Item Use Button to have it handy incase things get awry. Continue to fight Ganondorf with the Master Sword by waiting for the perfect time to parry, and don't forget to use the shield to deflect some of his vicious attacks.


